

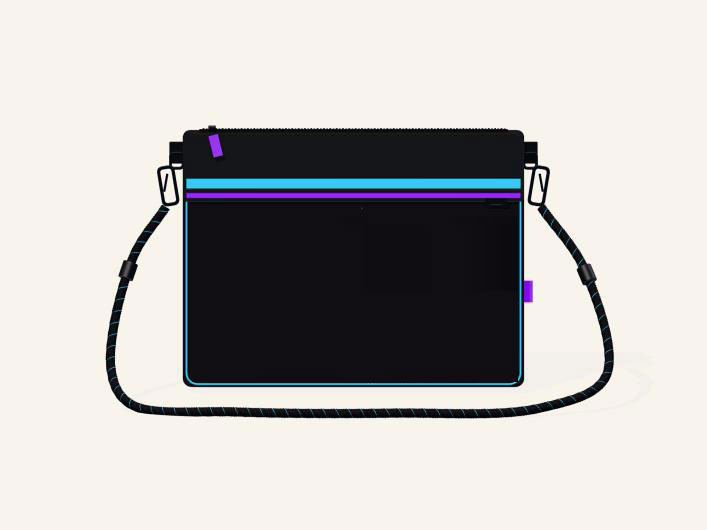
A sketch can show the personality of a bag, but it cannot answer every manufacturing question. For a custom phone crossbody bag, the development work is in turning a flat drawing into an object that opens easily, carries comfortably and protects its contents. If it also holds a wallet and accessories, “tech crossbody bag” may describe it more accurately than “phone pouch.”
The workflow below explains the decisions a buyer and bag factory should make before approving a sample. It is a development guide, not a claim that any particular illustrated concept has already been produced or tested.
The development stages at a glance
| Stage | Decision to make | What to check in the sample |
|---|---|---|
| 1. Carry brief | Define the intended devices and everyday items. | Fit, access and remaining usable space. |
| 2. Structure | Turn front and side views into a workable body depth and pattern. | Shape, seam placement and balance when filled. |
| 3. Opening | Choose the top closure and any protective fold. | Opening width, zipper travel and ease of use. |
| 4. Carry system | Confirm strap length, attachment points and detachable hardware. | Comfort, adjustability and attachment strength. |
| 5. Interior and finish | Specify pockets, lining, trims and decoration. | Item separation, edge finish and visual consistency. |
1. Begin with what the bag must carry
Before choosing an outside measurement, list the largest phone or device, its case, and any additional contents. Then decide whether the bag is meant to be slim or to have enough depth for a wallet and small accessories. This prevents a common mistake: approving an attractive front view that becomes too tight once seams, lining and an internal pocket take up space.
How the user reaches the contents affects opening position, pocket direction and strap placement.
2. Translate flat artwork into a three-dimensional structure
A front drawing shows proportions; angled, side, back and top views expose construction problems. A factory must determine where panels join, how the side width is formed, and whether the bag can keep a clean silhouette when empty and when filled. A thin gusset can make the design look streamlined, but it may restrict access or distort the front panel.
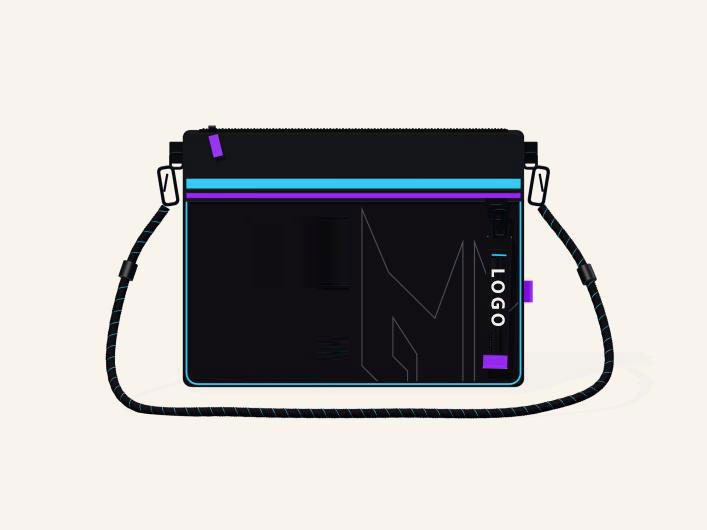
Separate functional lines from decoration. A colored strip may be fabric trim, print or binding; each changes the cutting and alignment requirements. Confirm the method in the prototype.
The following concept views compare two front-panel treatments for the same phone and tech crossbody bag. Both show a shoulder strap; they are illustrations for development, not photos of a finished production sample.
3. Resolve the top opening and internal pocket
For a compact tech bag, the top closure has to balance security with quick access. If the design combines a fold-over section with a zipper, the development team should check that the fold does not interfere with the zipper path or reduce the opening too much. Zipper ends, seam allowances and the finished opening width all need to be measured on a real sample.
An internal slip pocket can separate a phone from smaller items, but it must fit the intended device. Review the lining for usability as well as appearance.
4. Compare a detachable-strap version with a strap-free version
One bag body can sometimes support two carrying options: a crossbody version with a removable strap and a simpler pouch version without it. To make that work, the attachment tabs, rings and side seams must be planned from the start. Removing a strap from a visual mockup does not automatically create a finished strap-free design; exposed tabs or unused hardware may still affect its appearance.
For the crossbody version, check adjustable length, strap attachment and whether the loaded bag tilts. If a detachable accessory is proposed, check that it does not catch on the zipper or strap.
5. Approve a functional sample before locking the specification
The first sample is where suggested dimensions become measurable decisions. Fill it with the intended items; open and close it repeatedly; wear it at different strap lengths; and inspect the corners, binding, pocket opening and attachment points. Record any change to the body size, pattern, lining, hardware or decoration in the revised specification. Only then should the buyer approve the final sample and production documents.
What to send a bag manufacturer
A useful inquiry includes the intended contents, target dimensions, reference views, preferred materials, color direction, closure type, strap requirements, interior pocket needs and expected order quantity. If artwork is not final, say so clearly and ask the factory to quote decoration as a separate option. This makes early costing and sampling more accurate.
Liqibag supports OEM/ODM development for custom carry products. Browse our crossbody and shoulder bag range. For a new project, contact Liqibag with your brief so the proposed structure and sample requirements can be discussed.
 Custom Bible Bag Organizers & Bible Covers
 Backpacks & Drawstring Bags
 Cooler & Thermal Bags
 Custom Cosmetic Bags & Makeup Pouches
 Tote & Shopping Bags
 Tool, Medical & Equipment Bags
 Washable Kraft & Tyvek Bags
 Camera Bags & Photography Cases
 Crossbody & Shoulder Bags
 Pet Bags & Accessories
 Storage & Organizer Bags
 Travel & Duffel Bags